Main content
- What is the texture of Epoxy paint?
- What are the benefits of epoxy paint for coated surfaces?
- Epoxy paint lines are commonly used
- The detailed construction process of epoxy paint is technically correct
- Notes when applying epoxy paint you need to know
- WHAT IS Faux CONCRETE EPOXY FLOOR?
- DETAILED AND STANDARD CONSTRUCTION PROCESS OF EPOXY SELF-LEVELING PAINTING
- STANDARD ROLLING EPOXY PAINT APPLICATION PROCESS
- COMPLETE FACTORY FLOOR EPOXY PAINTING CONSTRUCTION PROCESS
- CONSTRUCTION PROCESS OF STANDARD Faux CONCRETE EPOXY FLOORS
- PRICE LIST FOR CONSTRUCTION OF SELF-LEVELING EPOXY PAINT 2023
- BẢNG GIÁ SƠN EPOXY GIÁ RẺ
- Newly updated epoxy paint price list
- Factory floor epoxy paint price list with self-leveling system, 2-3mm thickness
- The unit specializes in providing cheap epoxy paint today

Epoxy paint is one of the industrial paint lines commonly used for factories, warehouses, hospitals, etc. This paint line possesses outstanding features so it can be applied to many types of projects as well. resistant to many environmental and human impacts.
To better understand this product line, you cannot ignore the information below.
What is the texture of Epoxy paint?

What is the texture of Epoxy paint?
Epoxy paint is a specialized industrial line, combined with two main components: epoxy resin and curing agent.
Summary of the 2 main components of epoxy paint:
- Paint resin: this is a high proportion of paint, paint resin plays a role in creating useful features of this product line.
- Curing agent: because the paint resin does not have the ability to self-harden, it must be combined with a curing agent for the paint to dry. When the paint dries, it will create an extremely hard surface, providing absolute protection for painted surfaces.
In addition, there is also a combination of some additives and colorants, but the proportion is insignificant.
We can add specialized solvents allowed by the manufacturer and must use the correct ratio so that the paint can ensure its features.
What are the benefits of epoxy paint for coated surfaces?

The benefits of epoxy paint
1. Antibacterial, easy to clean
Epoxy paint has good antibacterial properties, the paint film has a glossy gloss and the paint's properties make it convenient to clean the surface, and dirt is easy to clean. Because of those characteristics, epoxy paint is widely used for clean rooms, pharmaceutical and food factories. With good antibacterial and anti-mold properties, easy to clean, it is difficult for any other paint line to do that.
2. Waterproof the surface
Epoxy lipstick is waterproof and water resistant, so it is also widely used to make water tank waterproofing paint, swimming pool waterproofing, roof waterproofing, house wall waterproofing and terrace waterproofing. This product line can protect projects for 6 to 7 years.
3. Anti-slip ability
Anti-slip is a requirement that many factories and warehouses are concerned about. Epoxy paint with high friction will help make the movement of workers or vehicles easy and safe. With good anti-slip properties, it can also be applied to basement construction, especially sloping ramps combined with striped paint to help vehicles move safely and easily arrange.
4. Anti-abrasion and does not generate dust
In addition to the above features, epoxy paint also has good chemical resistance due to its solid benzene rings and perfect mechanical abrasion resistance. Therefore, it ensures that the surface is always shiny, chemical contaminants are cleaned easily and are not abraded and create dust, so it is very safe for the health of users.
5. Good load-bearing capacity
With a hard surface, epoxy floor coating can withstand loads up to about 20 - 30 tons. The painted surface is hard but still highly elastic, so it absolutely protects the floor from strong impacts and the energy of large equipment. This is the ability that factories, warehouses with lots of machinery, goods, and cargo vehicles that frequently go in and out need.
Epoxy paint lines are commonly used

Epoxy paint lines are commonly used
On the paint market today there are many different lines of epoxy paint, each line has a number of different characteristics, applicable to different needs:
- Oil-based epoxy paint - typically applied to surfaces with low moisture content.
- Water-based epoxy paint - can be applied to surfaces with high humidity, the paint can be diluted with clean water at the prescribed ratio.
- Roller system epoxy paint - applied with a specialized roller, the finished thickness usually reaches 0.3mm.
- Self-leveling epoxy paint - this is a pre-mixed paint line. When applied, use a squeegee to spread the paint evenly on the surface, the paint film can reach a length of about 1mm - 3mm).
To get perfect epoxy paint layers, we need to learn the construction process to be able to fully utilize the paint's features.
The detailed construction process of epoxy paint is technically correct
Because it is a paint line with a special structure and outstanding features, the epoxy paint construction process also has different steps compared to conventional paint lines. Below are the construction steps to have a finished epoxy paint layer.
Step 1: Prepare the surface to be painted

Prepare the surface to be painted
Whether the epoxy paint film is durable or not, quality paint is not enough, it must also be well prepared for the concrete floor surface.
Normally, the standard concrete floor for epoxy paint construction is commercial concrete floor, with concrete grade 200-250. After pouring concrete, humidity must be ensured so that the concrete reaches the required grade, using a machine. Surface rubbed to finish, expansion joints can be cut for large floor areas over 100m2.
Other technical requirements:
- The floor must be waterproofed with nylon or geotextile.
- Clean the surface and smooth it with a scrubber, face grinder, and specialized vacuum cleaner.
- You can use water to clean the surface if there is too much dust, but the surface must be dry before painting can be applied.
- Deep holes, protrusions, cracks, chemicals, grease, etc. must be treated with specialized materials before epoxy paint can be applied to concrete floors.
Step 2: Prepare paint for construction
Prepare construction tools: bench scale, paint stirrer, clean buckets for storing paint, paint solvent,...
How to mix 2-component epoxy paint: open the package and mix the 2 components of the paint together. Use a stirrer to stir well for 3 - 5 minutes so that the paint can dissolve evenly between the paint resin and the curing agent. Can be diluted with specialized solvents recommended by the manufacturer and must be used in the correct ratio.
Note:
-
For small-scale projects, we should not mix all the paint to avoid waste, but we should weigh and measure the ingredients to use just enough without too much excess. But the ratio between the ingredients must be correct.
-
Must be mixed in the correct ratio as suggested by the manufacturer. If the ratio is not correct, it can damage the paint.
-
Specifications to know:
-
With the roller paint system, 1 liter of paint will roll about 8 - 10m2 in one layer.
-
With a self-leveling system, 1 liter corresponds to a thickness of 1mm/m2.
-
Step 3: Apply epoxy primer

Apply the epoxy primer layer
Primer is an important paint layer in the epoxy paint application process. This paint line has the effect of covering up tiny holes in the surface as well as serving as an intermediate adhesion layer between the epoxy coating and the concrete floor.
Normally, 1kg of primer can be used for 10m2 of standard floor.
After the floor surface has been prepared and cleaned, we proceed to apply a layer of primer across the surface using a roller. The primer will dry in 4 hours.
Step 4: Apply surface coating

Apply surface coating
After the primer layer has dried, we proceed to apply the paint layer to the floor.
Roller system epoxy floor paint:
- The paint is rolled with a short-haired roller. We roll 2 layers of paint (1 horizontal layer and 1 vertical layer). The first layer is dry before applying the second layer.
- Depending on many different factors, paint will have different drying times, usually the drying time of each layer of paint is 4 - 8 hours.
Self-leveling epoxy floor paint:
- Use specialized tools to pour self-leveling paint, a paint scraper, a roller to remove air bubbles, and nail shoes for the construction worker to move during construction.
- Self-leveling epoxy paint is simpler to apply than the roller system, just pour paint and use a paint scraper, the thickness of the paint layer 1mm, 2mm, 3mm,... will depend on this paint stripping step.
Step 5: Clean and accept the project

Cleaning and acceptance of the project
The epoxy paint layer will be 100% dry after 5-7 days of application, but you should only move gently, avoid dragging heavy objects. To avoid surface damage later.
Once the paint layer is complete, we proceed with cleaning and testing the project.
Notes when applying epoxy paint you need to know
In order for the epoxy paint layer to achieve the highest efficiency, we need to pay attention to these things during the construction process:
- The surface must be completely cleaned to prevent the paint layer from peeling off after application.
- The construction space must be well ventilated, because it will help the paint layer dry quickly to avoid air bubbles appearing, making the paint layer dull and not shiny.
-
The paint must be mixed in the correct ratio; if not, the quality of the paint layer will be reduced.
See more: Learn more about how to use colori epoxy paint.
WHAT IS Faux CONCRETE EPOXY FLOOR?
Imitation concrete epoxy flooring, also known as concrete-simulating epoxy flooring, is a type of floor created using epoxy paint and special finishing techniques to create the appearance of real concrete surfaces. This product is a popular and popular choice in finishing floors for many types of projects, from residential spaces such as houses and apartments, to commercial and industrial areas such as shops and offices. room, factory...
Epoxy concrete floors have many advantages such as:
Aesthetics:
Creates the natural and raw beauty of the concrete surface, giving the space an attractive modern and industrial look.
Easy to clean:
The floor surface has no gaps or edges, facilitating easier cleaning and cleaning, while reducing dirt and bacteria accumulation.
Durable:
Possesses high durability, resistant to abrasion, impact and scratches. In addition, it is also waterproof and chemical resistant, creating a floor surface that is superior in durability and environmental resistance.
Fast construction time:
Compared to building real concrete surfaces, constructing faux concrete epoxy floors is often quick and saves significant time.
Customize upon request:
Allows for customization with a variety of patterns, colors and effects, creating a unique and personalized look for your space in a creative and special way.
While faux concrete epoxy flooring provides the natural beauty of a concrete surface, it should be realized that it is only a simulated coating and does not provide the mechanical and durable properties of a real concrete surface. To ensure mechanical properties and durability of a concrete-like surface, consider using epoxy-coated concrete. This method not only creates a concrete-like appearance but also provides good abrasion and water resistance, ensuring a sturdy and durable floor surface over time.
Applications of faux concrete epoxy floors:
Epoxy concrete floors are widely used in many different types of spaces. Here are some examples of common applications for faux-concrete epoxy floors:
Workplace and office:
Widely used in office spaces, companies, agencies and other working areas, to create an industrial, modern and easy-to-maintain space.
Retail stores and restaurants:
A popular choice for retail stores, fashion stores, restaurants and cafes, to create a fashionable and creative space, enhance the shopping experience and attract customers.
Factory and warehouse:
A popular choice for factories, warehouses and industrial areas. With its abrasion, load and chemical resistance properties, it protects floors and creates a safe and manageable working environment.
Garage floor and parking lot:
Typically applied in private garages, public parking lots and parking areas to create a durable, waterproof and easy-to-clean surface. Being grease and stain resistant, it helps maintain spaces clean and attractive.
Sports and entertainment area:
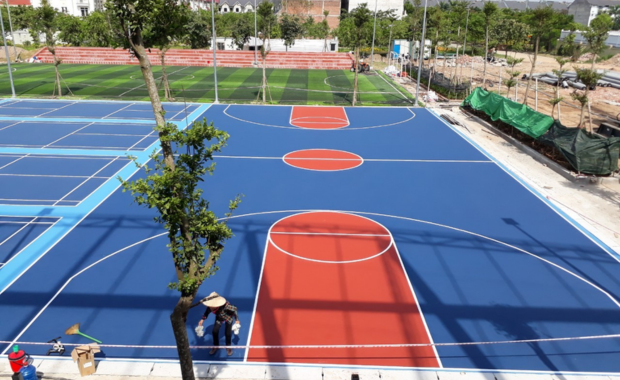
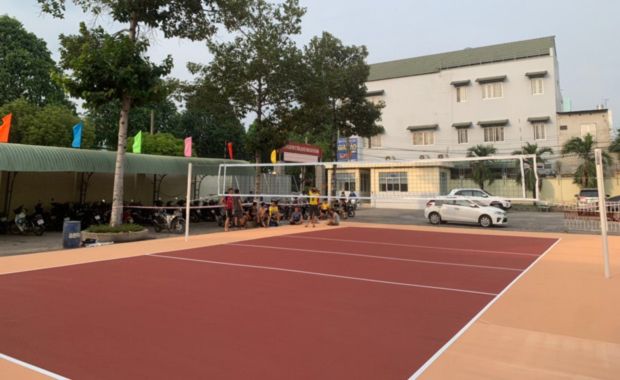
Often used in sports areas such as mini football fields, children's playgrounds and entertainment areas to create a safe, non-slip and visually appealing surface. This ensures a safe and convenient sports and entertainment environment for everyone involved.
Art spaces:
Suitable in art spaces, exhibitions and displays, creating a unique appearance and protecting floors while providing a foundation for works of art.
Commercial areas and industrial parks:
Widely used in commercial areas and industrial parks such as factories, workshops, railway stations, airports, shopping centers, supermarkets, hospitals and many other places. This use brings professionalism, durability and ease of cleaning to work and business spaces.
Residential area:
It is the ideal choice for apartments, townhouses, residential areas and apartment complexes, providing a luxurious, easy-to-clean and durable space.
Medical area:
Used in medical areas such as hospitals, operating rooms, laboratories and diagnostic rooms, creating a clean, safe and anti-slip environment, ensuring protection for medical staff and patients. .
Restaurant and hotel area:
It is the top choice for restaurants, hotels, bars and food areas, creating aesthetically pleasing, easy-to-clean and safe spaces, bringing a great experience to customers.
Exterior area:
Also suitable for exterior areas such as swimming pools, gardens, balconies and hallways. This is an anti-slip, waterproof and durable solution, ensuring safety and aesthetics for outdoor spaces.
DETAILED AND STANDARD CONSTRUCTION PROCESS OF EPOXY SELF-LEVELING PAINTING
STEP 1: SURFACE PREPARATION

This is one of the important steps in applying self-leveling epoxy paint. First you need to grind, clean the surface and vacuum. Make sure the surface is flat, dust-free and creates adhesion for the paint layer. After cleaning, check the surface again. If there are cracks or holes, they need to be smoothed before painting.
STEP 2: SURFACE PRIME
After cleaning the surface, we apply primer to create adhesion, waterproofing and contribute to a smoother coating surface. There are two methods for priming: rolling a roller or using a spray gun to spray epoxy primer. Wait for the epoxy primer to dry for about 6 to 8 hours depending on the application method.
STEP 3: TREATMENT OF FLOOR SURFACES THAT DO NOT MEET STANDARDS (IF NECESSARY)
This step prevents water vapor from seeping back and ensures the hardness of the floor. Mix sand and epoxy mixture in the specified ratio. Mix at high speed using a specialized leveling machine. This step is only used for surfaces that do not meet standards.
STEP 4: PROCEED TO COATING

This final coat is a self-leveling epoxy paint. Once mixed, it is poured along the surface area and poured from the inside out.
STEP 5: ACCEPTANCE OF THE WORK
Construction acceptance time is about 3 to 4 days after applying the coating. At this step, it is necessary to check the quality before handing it over to the business owner. Detect problems that need to be fixed early to avoid wasting time.
STANDARD ROLLING EPOXY PAINT APPLICATION PROCESS
To have a high-quality floor, in addition to ensuring product quality, the construction process also plays an extremely important role in determining durability and aesthetics. It is necessary to ensure proper implementation of the set standards, including the following steps:
STEP 1: INSPECT AND TREAT FLOOR GRINDING
- Eliminate floor surface defects such as convex, concave, cracked,... (if any).
- Use a machine to grind and create roughness for adhesion, a premise for improving adhesion.
- Use a specialized machine with built-in vacuum cleaner to do this.
STEP 2: CLEAN AND CLEAN
- Before applying paint layers, it is necessary to clean thoroughly to remove dirt, impurities, and grease remaining on the floor.
- Make sure the floor is dry and airy. You should use ventilation systems in closed areas and narrow spaces.
STEP 3: APPLY PRIMER COATING
- It is an epoxy primer to increase the hardness of the floor.
- At the same time, it is also an intermediate layer between the floor and the epoxy paint layer, increasing the level of adhesion.
STEP 4: APPLY FIRST LAYER EPOXY PAINT
- Use a stirrer to mix the epoxy paint ingredients, forming a homogeneous mixture.
- Use a roller to roll the first layer onto the floor surface, rolling evenly.
- Scrub and clean the surface after applying the first layer.
STEP 5: APPLY SECOND-LAYER EPOXY PAINT
- The final step is to apply the second layer (finishing layer), which requires meticulousness, thoroughness and care because this layer of paint will determine the aesthetics of the floor later.
- Applying second-layer epoxy paint requires experienced and highly skilled workers to ensure the best quality and aesthetics for the construction floor surface.
COMPLETE FACTORY FLOOR EPOXY PAINTING CONSTRUCTION PROCESS
STEP 1: PREPARE THE FLOOR SURFACE
Meticulous and accurate floor surface preparation plays an important role in enhancing the adhesion of epoxy paint. This not only ensures maximum efficiency for the epoxy painting application process, but also provides outstanding final results in terms of aesthetics and durability.
To ensure a perfect concrete floor surface before applying epoxy paint, careful preparation steps must be taken. If the floor is dented or has small cracks, it is necessary to use specialized putty to fill these areas. Then, using a sander helps create a flat surface and enhances adhesion for the next layer of epoxy paint.
To facilitate epoxy painting, cleaning the surface after sanding is very important. Use a vacuum cleaner or other tools to remove all dust, grease and other impurities from the floor surface. This process ensures the epoxy paint has good adhesion and brings the highest final efficiency to the construction process.
STEP 2: APPLY EPOXY BASE PAINT

- Epoxy primer is an important and indispensable step in the Epoxy paint application process. This is the key to enhancing adhesion, durability and ensuring effectiveness of the main Epoxy paint layer, regardless of whether you use a rolling system or a self-leveling system. It also provides a perfectly prepared surface for the next steps of the Epoxy painting process.
- Epoxy primer is an important intermediate layer between the concrete floor and the coating layer. It has a waterproofing effect and creates good adhesion, protects the floor from water and liquids, and enhances the durability and effectiveness of the main Epoxy paint layer. Epoxy primer creates the ideal base, helps the coating adhere tightly and provides a more beautiful and durable final result.
- The specified number of epoxy primer layers is: 1 layer.
- After applying Epoxy primer, the surface needs to dry for at least 2 to 4 hours.
STEP 3: PROCEED TO APPLY THE COMPLETE COATING COATING

Before applying Epoxy coating to finish the floor surface, focus on mixing the 2-component Epoxy paint correctly. This ensures that you are following the manufacturer's instructions and increasing your chances of achieving the best results for your project.
- When using epoxy paint, the specified number of paint layers is usually 2 layers. You can use a paint roller or a specialized paint spray gun. Each layer of paint has a thickness of 0.12 - 0.15mm. Leave at least 4 hours between two coats to ensure the previous coat is dry and hard. The end result will be a beautiful, durable, satisfying floor surface for your project.
- Self-leveling Epoxy paint requires a team of professional and highly skilled construction workers. The construction process requires specialized techniques and skills. If you do not know how to apply, the painted surface can be uneven, rough and have thickness differences, affecting aesthetics and durability. Therefore, using self-leveling Epoxy paint requires professionalism and experience to achieve the best results.
During the application of self-leveling Epoxy paint, a minimum of 3 people are needed: one person pours the paint, one person removes the paint, and the other person uses an Epoxy roller to remove air bubbles. The suitable tool is a serrated squeegee. The paint layer thickness is usually from 1mm - 3mm, depending on the intended use. Requires collaboration and professional skills to ensure a flat and high-quality floor surface.
To meet the requirements of abrasion resistance and anti-slip resistance, combine Epoxy paint with quartz sand (glass beads) to achieve better results. Quartz sand can be mixed into the paint layer or spread evenly on the floor surface after completing the first layer of paint. Then, apply the second layer of Epoxy paint as usual. This method enhances wear resistance and prevents slipping, providing a safe and durable floor surface for the project.
Note: Each type of Epoxy paint has separate specifications, so carefully read the instructions or technical documents that come with each Epoxy product.
Please refer to the shelf life table of epoxy paint at 30 degrees Celsius as follows:
|
Waiting time between classes Minimum Max |
4 hours 24 hours |
| Walkable | 18 hours |
| Light load | 02 days |
| Fully load-bearing | 05 days |
Note that application lead time may vary depending on the specific Epoxy paint product and weather conditions. Adhering to the correct waiting time is very important to achieve the best Epoxy painting results.
STEP 4: ACCEPTANCE OF THE WORK
A standard epoxy paint construction project needs to ensure the following factors:
- The painted surface is flat and smooth.
- Paint evenly.
- Completely dry and load-bearing as required.
- Good abrasion resistance and anti-slip as required.
CONSTRUCTION PROCESS OF STANDARD Faux CONCRETE EPOXY FLOORS
STEP 1: PREPARE THE FLOOR SURFACE
- The first step is to clean the concrete floor surface thoroughly, removing all dirt, grease and other contaminants using a sander or effective cleaning method.
- Fill small cracks and holes on the floor surface with specialized Epoxy filler powder, to ensure a flat and even surface.
STEP 2: APPLY PRIMER EPOXY
- Next, mix the Epoxy primer according to the manufacturer's instructions.
- Use a brush or paint sprayer to paint the primer layer on the floor surface, creating a solid primer to help enhance the adhesion of the Epoxy paint layer.
STEP 3: APPLY SELF-LEVELING EPOXY PAINT
- Next, mix and spread the self-leveling Epoxy paint onto the floor surface using a serrated squeegee.
- Use an Epoxy roller to break down air bubbles and help achieve a perfect and even surface.
STEP 4: APPLY THE COATING OF EPOXY PAINT
- After the self-leveling paint layer is completely dry, mix and spread the Epoxy paint layer on the floor surface.
- Use a serrated squeegee to spread the coating evenly, enhancing the anti-slip properties and aesthetics of the floor surface.
STEP 5: COMPLETE AND CHECK
- Allow the paint layer to dry completely according to the manufacturer's specified time before using the floor.
- Carefully check the Epoxy floor surface to ensure it meets quality standards and has no defects on the surface.
The above process helps ensure the construction project achieves the highest quality and efficiency, while also bringing great beauty and aesthetics to your space.
PRICE LIST FOR CONSTRUCTION OF SELF-LEVELING EPOXY PAINT 2023
| No | Floor area | Unit price |
| Materials: Epoxy paint; Norm: 1Kg/square meter | ||
|
1 |
> 2000 square meter |
$6,92/square meter |
|
2 |
1000 – 2000 square meter |
$6,92/square meter |
|
3 |
500 – 1000 square meter |
$6,92/square meter |
|
4 |
300 – 500 square meter |
$8,14/square meter |
| Materials: Epoxy paint; Norm: 1.5Kg/square meter | ||
|
1 |
> 2000 square meter |
$8,95/square meter |
|
2 |
1000 – 2000 square meter |
$8,95/square meter |
|
3 |
500 – 1000 square meter |
$8,95/square meter |
|
4 |
300 – 500 square meter |
$10,18/square meter |
| Materials: Epoxy paint; Norm 2Kg/square meter | ||
|
1 |
> 2000 square meter |
$11,40/square meter |
|
2 |
1000 – 2000 square meter |
$11,80/square meter |
|
3 |
500 – 1000 square meter |
$11,80/square meter |
|
4 |
300 – 500 square meter |
$12,62/square meter |
BẢNG GIÁ SƠN EPOXY GIÁ RẺ
|
No |
PRODUCT NAME OF EPOXY COLORI PAINT | PRODUCT CODE | SPECIFICATIONS | REFERENCE PRICE |
|
1 |
Colori solvent-based epoxy primer for metals (red) |
CH269 |
Set/20kg |
$118,09 |
|
Set/5kg |
$31,85 |
|||
|
2 |
Colori solvent-based epoxy primer for metal (gray) |
CH270 |
Set/20kg |
$110,14 |
|
Set/5kg |
$29,86 |
|||
|
3 |
Colori solvent-based epoxy primer for concrete floors |
CH271 |
Set/20kg |
$117,37 |
|
Set/5kg |
$31,67 |
|||
|
4 |
Colori solvent-based epoxy coating (various colors) |
CH272 |
Set/20kg |
$121,70 |
|
Set/5kg |
$32,75 |
|||
|
5 |
Colori self-leveling epoxy paint (solvent-based) |
CH273 |
Set/20kg |
$146,27 |
|
Set/5kg |
$38,90 |
|||
|
6 |
Colori water-based epoxy coating |
TP202W |
Set/20kg |
$181,97 |
|
Set/5kg |
$49,66 |
|||
|
7 |
Colori water-based epoxy primer |
TP201W |
Set/20kg |
$174,02 |
|
Set/5kg |
$47,68 |
|||
|
8 |
Colori self-leveling water-based epoxy coating |
TP302SLW |
Set/20kg |
$181,97 |
|
Set/5kg |
$49,66 |
|||
|
9 |
Colori epoxy paint solvent |
CH274 |
Barrel/19 Liters |
$59,59 |
|
Can/5 Liter |
$16,71 |
Newly updated epoxy paint price list
Below is a reference epoxy paint price list for you to plan your budget. To know the detailed price, you can contact us immediately.
Price list of 3-layer rolling system epoxy factory floor paint
|
No |
Location | Kind of paint | Unit | Current Status | Price (USD) |
|
1 |
paint in house | Roller system paint | Square meters | New background |
$2,85 - $3,26 |
|
2 |
Square meters | Old background |
$3,46 - $4,07 |
Factory floor epoxy paint price list with self-leveling system, 2-3mm thickness
|
No |
Surface condition | Paint system | Unit | Thickness | Price (USD) |
|
1 |
New concrete foundation | Self-leveling paint | Square meters |
1 - 1.5mm |
$8,14 - $10,18 |
|
2 |
Self-leveling paint |
MSquare meters |
2mm |
$10,18 - $11,40 | |
|
3 |
Self-leveling paint |
Square meters |
3mm |
$13,84 - $15,47 | |
|
4 |
Old concrete floor | Self-leveling paint | Square meters |
1 - 1.5mm |
Survey |
|
5 |
Self-leveling paint | Square meters |
2mm |
Survey | |
|
6 |
Self-leveling paint | Square meters |
3mm |
Survey |
Price list of chemical resistant epoxy paint for factory floors
|
No |
Surface condition | Paint system | Unit | Thickness | Price (USD) |
|
1 |
New concrete foundation | 3-layer roller paint system | Square meters |
- |
Contact |
|
2 |
Self-leveling paint | Square meters |
2mm |
Contact | |
|
3 |
Self-leveling paint | Square meters |
3mm |
Contact | |
|
4 |
Old concrete floor | 3-layer roller paint system | Square meters |
- |
Survey |
|
5 |
Self-leveling paint | Square meters |
2mm |
Survey | |
|
6 |
Square meters |
3mm |
Survey |
The unit specializes in providing cheap epoxy paint today
Coloripaint.vn is one of the reputable epoxy paint suppliers today. Our products are continuously researched and developed to bring customers the best product lines. For advice and an accurate quote, you can contact us immediately for a free consultation.
Contact Info:
CHI HAO TRADING SERVICE COMPANY LIMITED
Address: 606/76/4 National Highway 13, Hiep Binh Phuoc Ward, City. Thu Duc, City. Ho Chi Minh
Phone: 028 626 757 76 – Fax: 028 626 757 28
Mobile: 0903 11 22 26 – 0903 61 22 26 – 0903 08 52 66 – 0903 17 22 26
Email: [email protected]